
This article is the 17th entry in the CAMPHOR- Advent Calendar 2018.
I am morishin. This month, I had the opportunity to host an event and collect participation fees. To save the hassle of collecting payments at the venue on the day of the event, I asked participants to make payments in advance. I considered payment methods that would minimize transaction fees and the hassle for participants, and decided to create a payment page using Stripe and Firebase, allowing them to pay via credit card. In this article, I would like to introduce how to create that payment page.
Here is the repository. Anyone can set up a payment page by preparing accounts for Firebase and Stripe and following the steps in the README.
Payment Page Specifications#
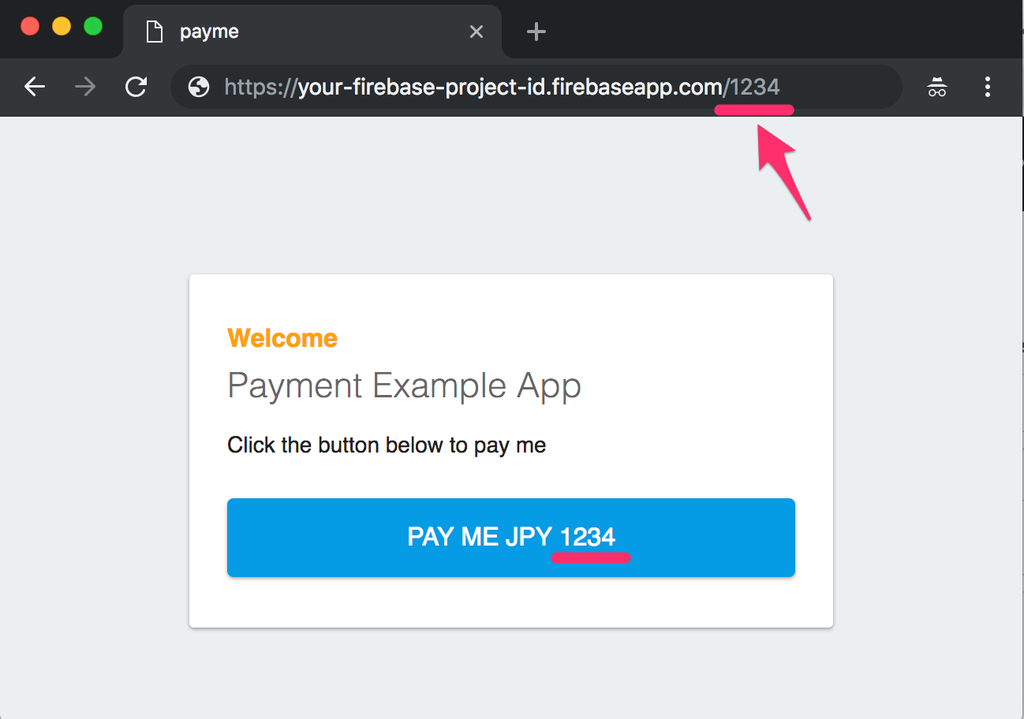
PayPal has a service called PayPal.Me, which allows you to share a page to pay a specific amount to a specific user via a URL like https://paypal.me/<username>/<amount>. I created a service that mimics this by allowing payment amounts to be specified in the URL. While it would be fine to use PayPal.Me, it requires the payer to have a PayPal account and has slightly higher fees, so I decided to use Stripe instead.
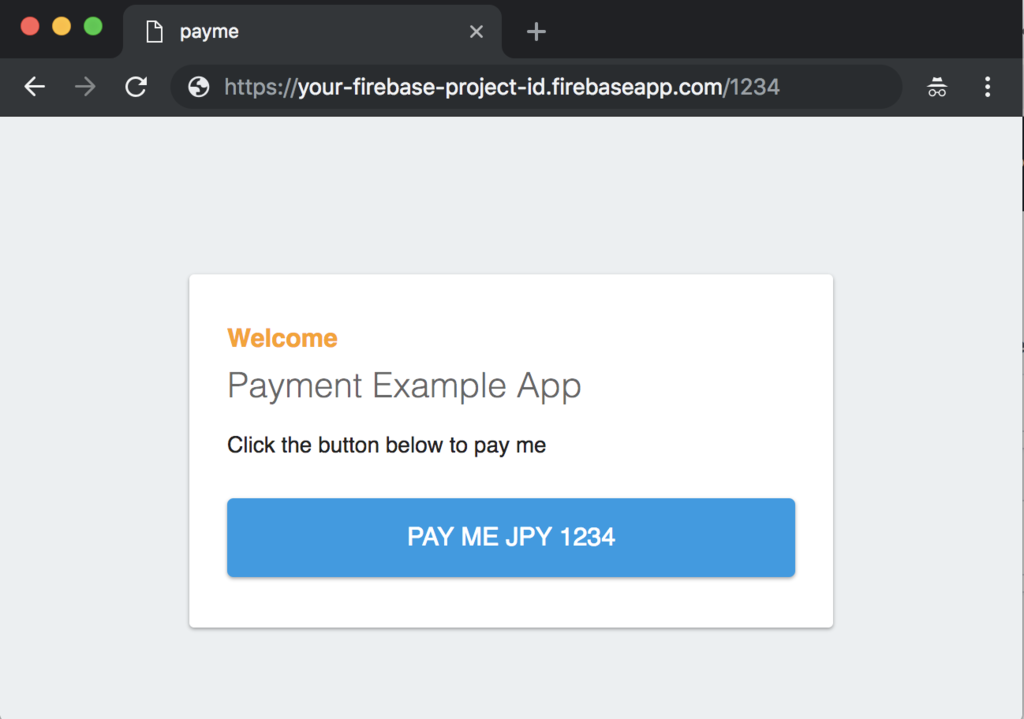
When you open the page with the specified amount at the end of the URL, you will see a screen like this:
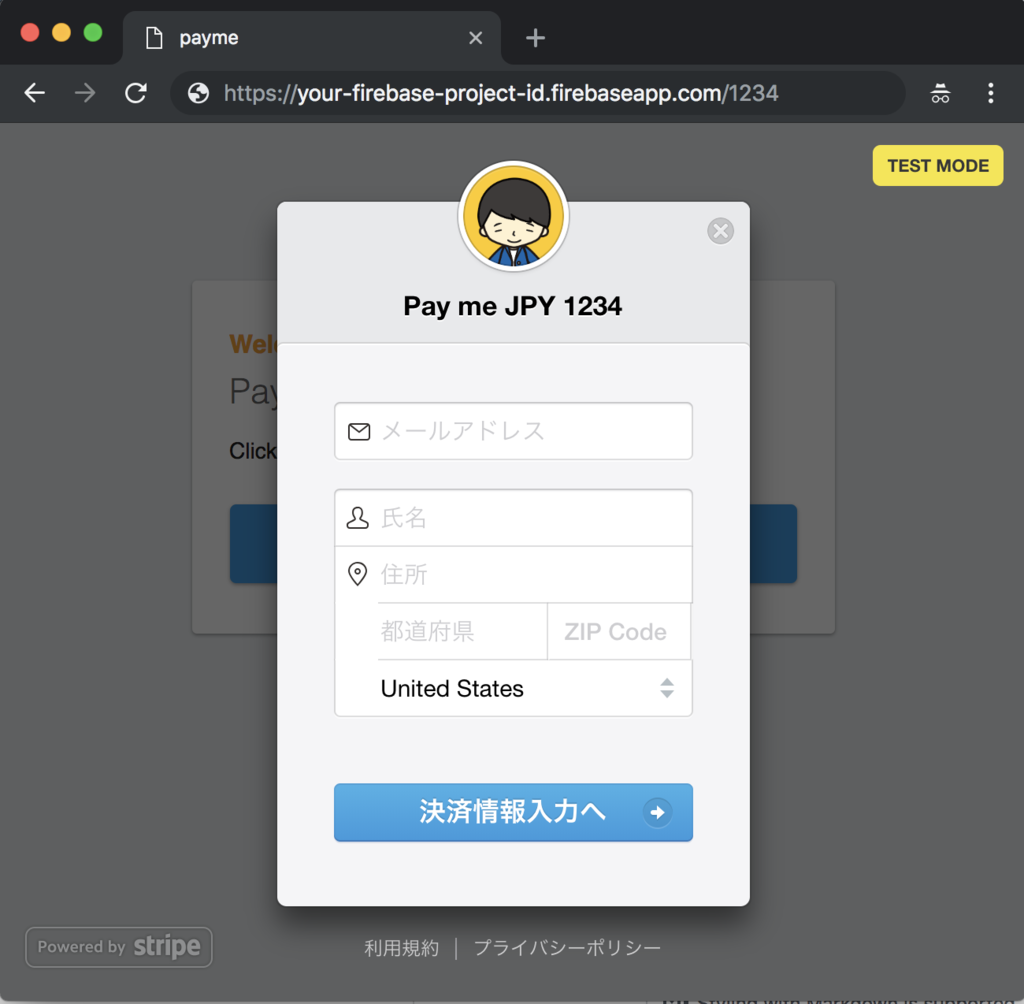
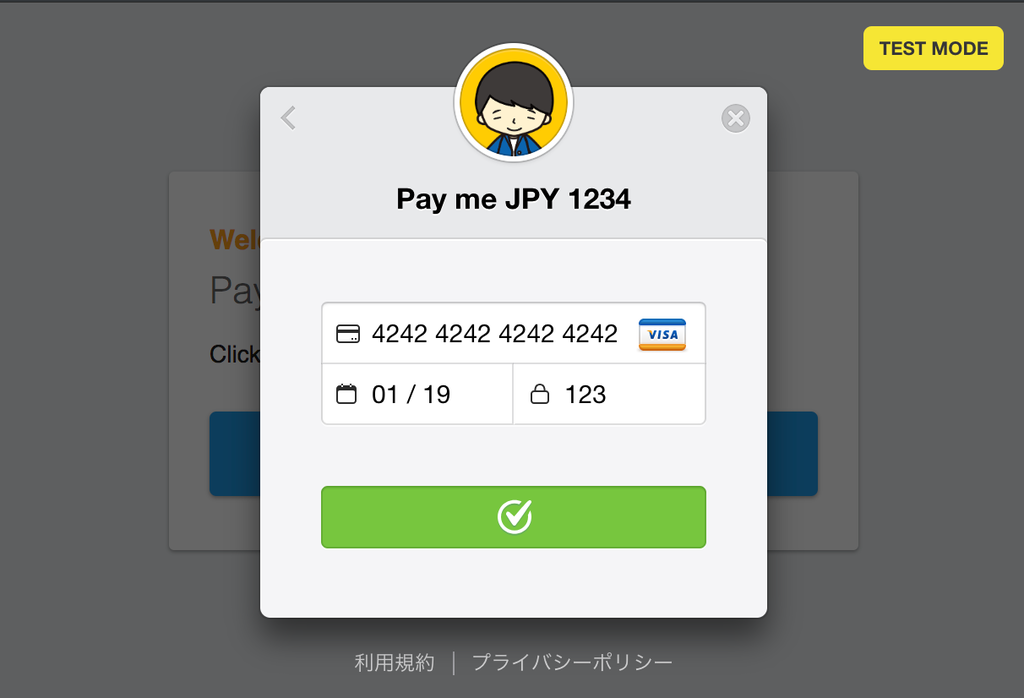
When you press the payment button, a screen for entering credit card information appears, allowing you to pay the specified amount.
Structure#
The payment page is a static web page delivered via Firebase Hosting. While S3 or other services could work, using Firebase is easier since I want to use Cloud Functions as well. When the user enters payment information in the form on the web page, it is sent to Stripe's server, which returns a token used for payment processing. This token is then used to trigger a Cloud Function's HTTP endpoint, which interacts with Stripe to process the payment.
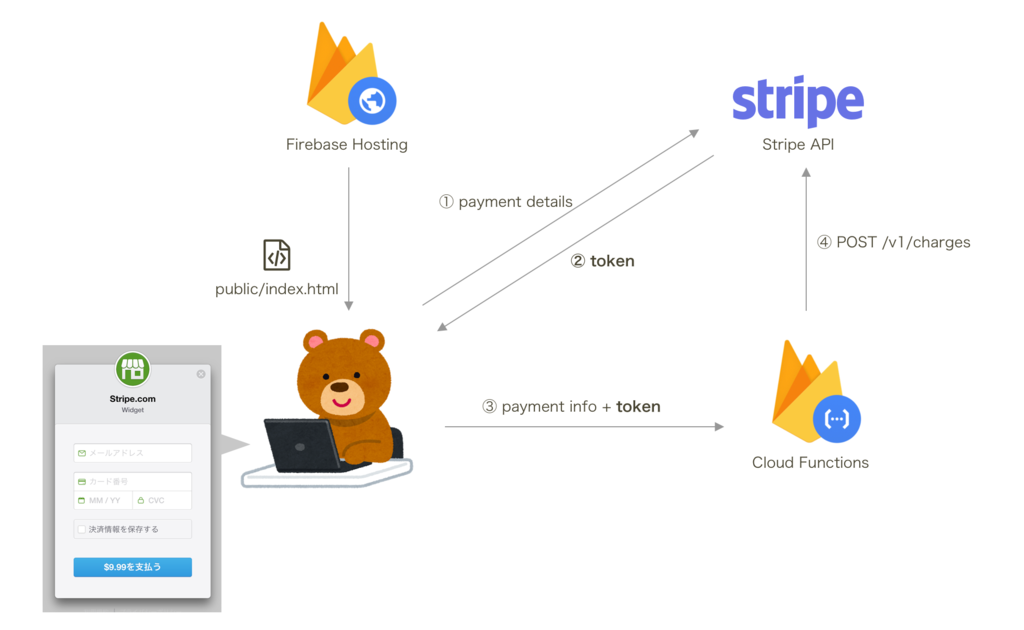
The process of entering credit card information and receiving a token from Stripe can be done using the SDK provided by Stripe, so you only need to implement a small part yourself.
Now, let's look at the specific steps to create it.
Steps to Create#
1. Create a Firebase Project#
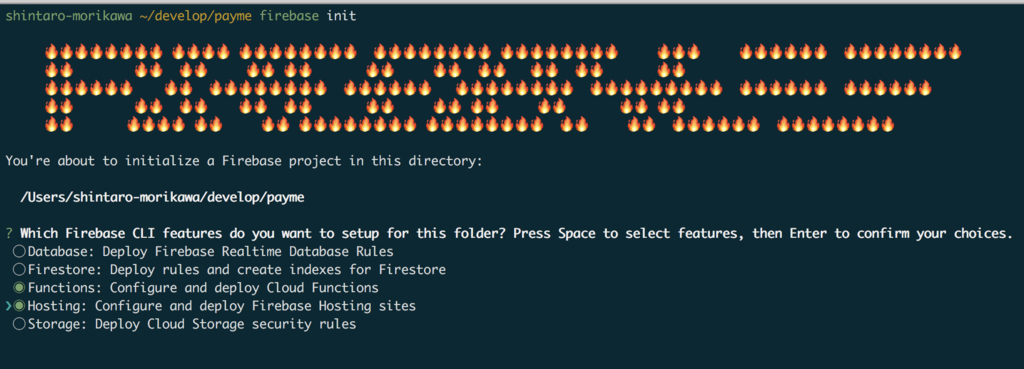
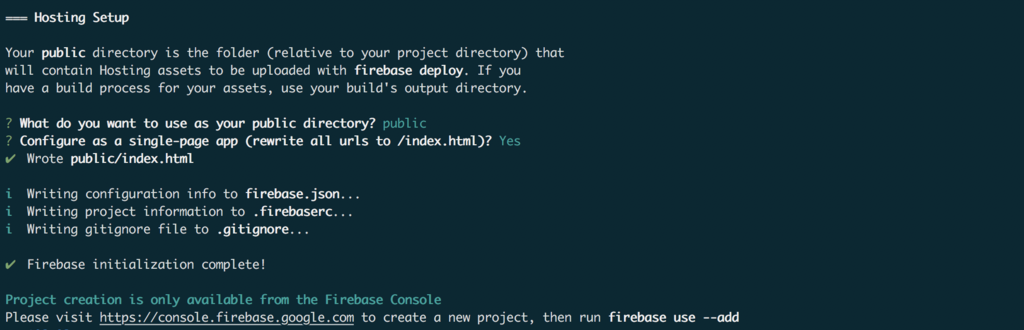
Install the Firebase CLI as per the official documentation and create a new project. Run firebase init, and since we will be using Functions and Hosting, select them as shown in the image.
(My terminal font is such that the logo looks a bit unfortunate)
You will be asked various questions, but if you answer them appropriately, the setup will complete, and you will be instructed to create a project from the Firebase web console and run firebase use --add.
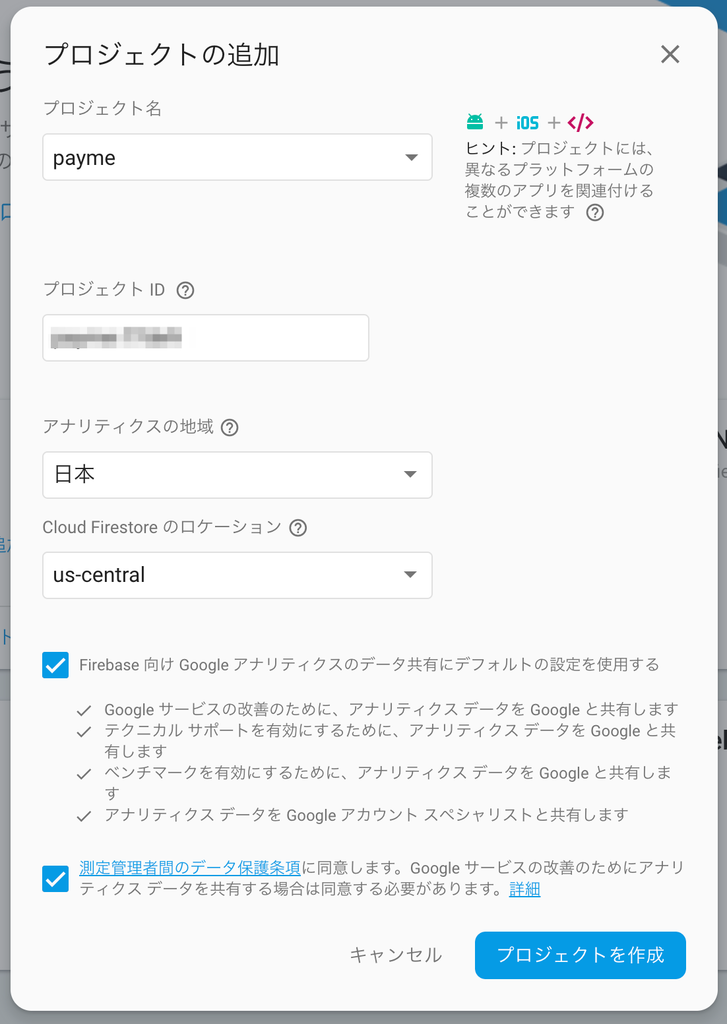
Open the Firebase console in your browser and create a project with your desired name.
Once created, run firebase use --add in the directory where you just ran firebase init to link the project.
Now you have an environment set up where you can write code and deploy it with firebase deploy.
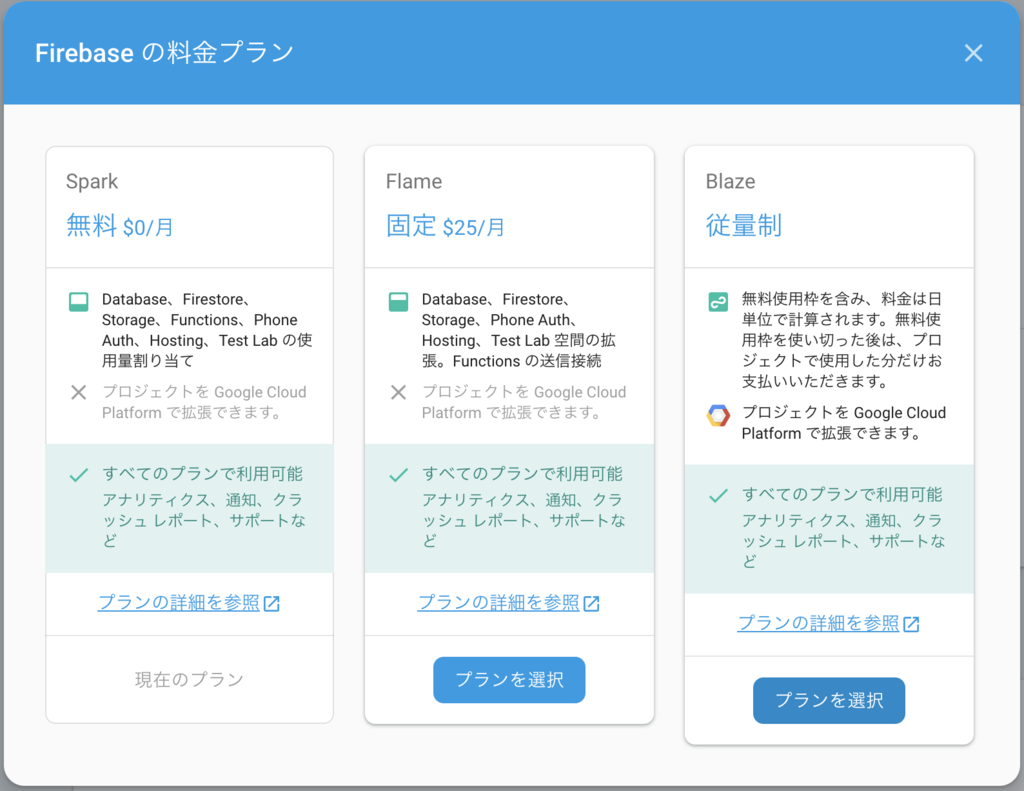
Also, to send network requests from Cloud Functions to services outside Google, you need to upgrade to the Blaze plan, so make sure to set that up.
2. Register with Stripe and Obtain API Keys#
Since we will use Stripe for payments, register and obtain the API keys from the console. There are test and live keys, but we will use the test key for now.

3. Implement the Web Page#
Write the page to be delivered via Firebase Hosting in public/index.html. The task is simple: when the payment button is pressed, display the Stripe component, and once the token is received, call the Cloud Function. I wrote it directly in the HTML file. The public key for the Stripe API obtained earlier will be pasted into this source.
<body>
  <div id="message">
    <h2>Welcome</h2>
    <h1>Payment Example App</h1>
    <p>Click the button below to pay me</p>
    <a id="button" arget="_blank" href="https://firebase.google.com/docs/hosting/">Pay me</a>
  </div>

  <script>
    const STRIPE_PUBLIC_KEY = "YOUR_STRIPE_PUBLIC_KEY"; // TODO: PUT YOUR STRIPE PUBLIC KEY HERE
    const CHARGE_CLOUD_FUNCTION_TRIGGER_URL =
      "YOUR_CLOUD_FUNCTION_TRIGGER_URL"; // TODO: PUT YOUR FIREBASE FUNCTIONS URL HERE
    const DEFAULT_AMOUNT = 50;
    const AMOUNT_LIMIT = 1000000;
    const CURRENCY = "JPY";
    const requestCharge = async (token, amount, currency) => {
      const res = await fetch(CHARGE_CLOUD_FUNCTION_TRIGGER_URL, {
        method: "POST",
        body: JSON.stringify({
          token,
          charge: {
            amount,
            currency
          }
        })
      });
      const data = await res.json();
      data.body = JSON.parse(data.body);
      return data;
    };
    document.addEventListener("DOMContentLoaded", () => {
      const amount = Math.min(parseInt(location.pathname.substring(1), 10) || DEFAULT_AMOUNT, AMOUNT_LIMIT);
      const handler = StripeCheckout.configure({
        key: STRIPE_PUBLIC_KEY,
        locale: "auto",
        token: async token => {
          let res = await requestCharge(token, amount, CURRENCY);
          if (res.body.error) {
            console.error("Error: Failed to pay");
            console.error(res.body.error);
            return;
          }
          console.log("Success: Thank you");
        }
      });
      document.querySelector("#button").addEventListener("click", e => {
        e.preventDefault();
        handler.open({
          image: "https://g.morishin.me/icon.png",
          name: `Pay me ${CURRENCY} ${amount}`,
          amount,
          currency: CURRENCY,
          billingAddress: true,
          allowRememberMe: false
        });
      });
      document.querySelector("#button").innerText = `Pay me ${CURRENCY} ${amount}`;
    });
  </script>
</body>
4. Implement the Cloud Function for Payment Processing#
Write the Cloud Function that interacts with the Stripe API to process payments in functions/src/index.ts. The main processing occurs in the charge part, where you pass the secret key obtained from Functions.config().stripe.token, the payment amount, and the email address for the receipt to the API. If the payment is completed successfully, it returns a 200 response. The secret key can be set using firebase functions:config:set stripe.token="SECRET_KEY" from the CLI.

import * as Functions from "firebase-functions";
import * as Admin from "firebase-admin";
import * as CORS from "cors";
import * as Stripe from "stripe";

Admin.initializeApp(Functions.config().firebase);

const charge = (request: Functions.Request, response: Functions.Response) => {
  const body = JSON.parse(request.body);
  const token = body.token.id;
  const email = body.token.email;
  const amount = body.charge.amount;
  const currency = body.charge.currency;

  // TODO: Remember to set token using >> $firebase functions:config:set stripe.token="SECRET_STRIPE_TOKEN_HERE"
  const stripe = new Stripe(Functions.config().stripe.token);
  stripe.charges
    .create({
      amount,
      currency,
      description: "payme",
      source: token,
      receipt_email: email
    })
    .then(charge => {
      send(response, 200, {
        message: "Success",
        charge
      });
    })
    .catch(error => {
      console.error(error);
      send(response, 500, {
        error: error.message
      });
    });
};

function send(response: Functions.Response, statusCode: number, body: any) {
  response.send({
    statusCode,
    headers: { "Access-Control-Allow-Origin": "*" },
    body: JSON.stringify(body)
  });
}

exports.charge = Functions.https.onRequest((request, response) => {
  const CORSRequestHandler = CORS({ origin: true });
  CORSRequestHandler(request, response, () => {
    if (request.method !== "POST") {
      send(response, 405, { error: "Invalid Request" });
    }
    try {
      charge(request, response);
    } catch (e) {
      console.log(e);
      send(response, 500, {
        error: `The server received an unexpected error. Please try again and contact the site admin if the error persists.`
      });
    }
  });
});
5. Deployment#
Deploy the Cloud Functions using the CLI with firebase deploy --only functions.
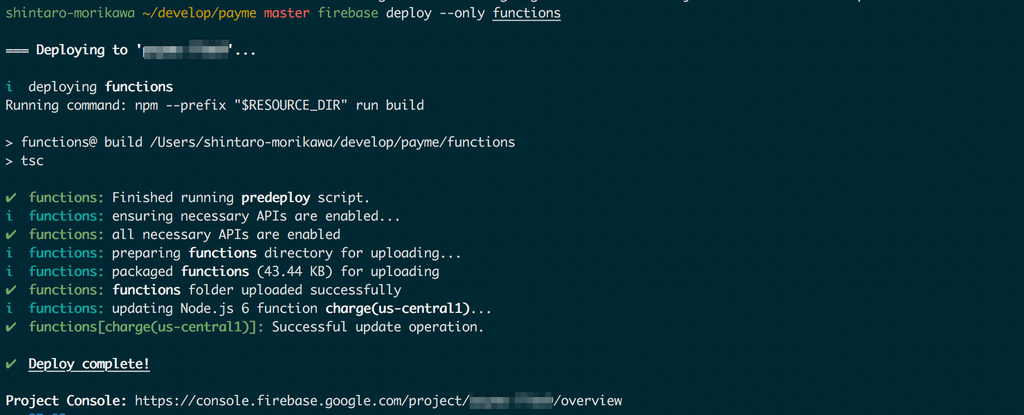
Once the deployment of Cloud Functions is complete, the deployed function and its HTTP trigger endpoint will be listed on the Functions page of the web console.
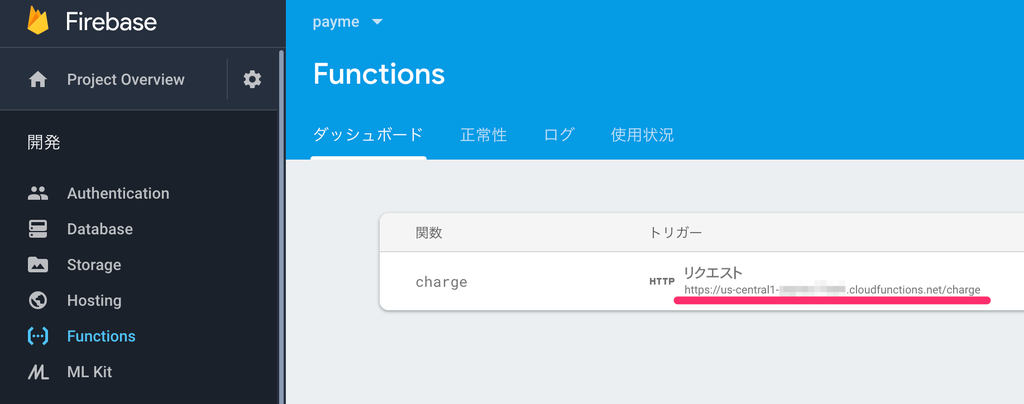
Copy this URL into the CHARGE_CLOUD_FUNCTION_TRIGGER_URL in the HTML of the payment page, then deploy Hosting with firebase deploy --only hosting. Once the deployment is complete, the console will display the URL of the Hosting website, so open it in a browser to check the site. You can specify the payment amount with the number at the end of the URL.
6. Functionality Check#
Since we have set the API key for the test environment, you can test the payment functionality using test credit card information. Use the test card information provided in the documentation to actually make a payment.
(You can skip entering name and address based on options during implementation)

If the process is executed correctly, the completed payment information will be displayed on the payment page of the Stripe console.

7. Moving to Production#
Once functionality is confirmed, replace the API key with the live version and you’re done! 🎉
Points to Note#
- While you might want to create a tipping page for yourself, it seems that simply creating a page for tipping without paying for some product is against current rules in Japan, so please be cautious.
- While Visa and others are supported, it seems that a separate application is required to enable JCB cards.
- The HTTP trigger for Cloud Functions is publicly accessible on the internet, and the endpoint can be viewed from the web page source, so it can be attacked by malicious users. It would be wise to implement some countermeasures to avoid inflated charges on Firebase.
Conclusion#
With this system, I was able to successfully collect payments for the event in advance, while keeping fees lower than existing services. Stripe's SDK and documentation are very well organized, allowing for a smooth implementation. Firebase is also incredibly convenient; for this kind of use, you can use it for free, and you can set a custom domain for Hosting without any complaints. However, developing with Cloud Functions can be a bit tough, as testing is difficult and deployment can sometimes be unusually slow, which can be exhausting.
How did you find this? There are various payment services available in the world that can be used conveniently, but if you are concerned about fees and payment hassles, why not use this article as a reference to create a better payment page yourself?
Tomorrow's entry in the CAMPHOR- Advent Calendar 2018 will be by plus. Stay tuned! 😉👋